The JMS project

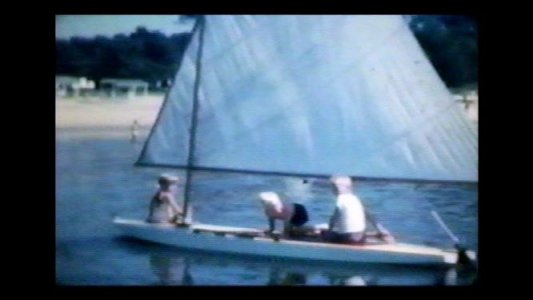
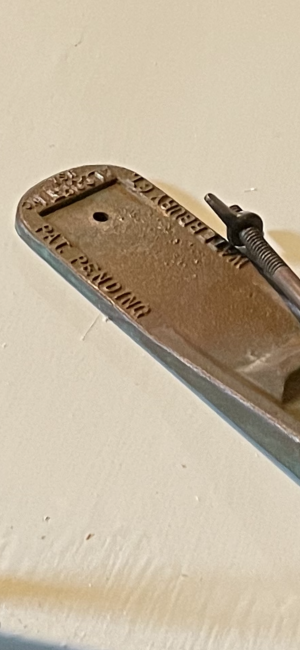
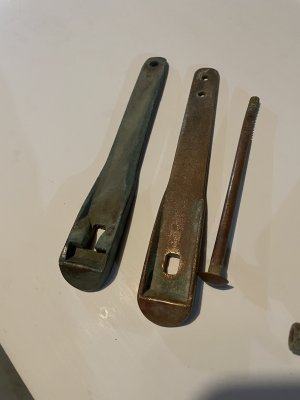
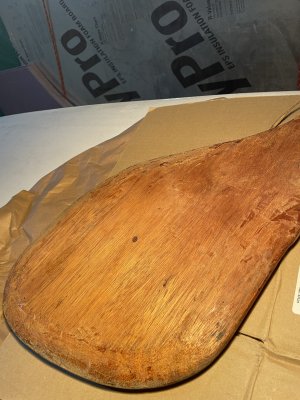
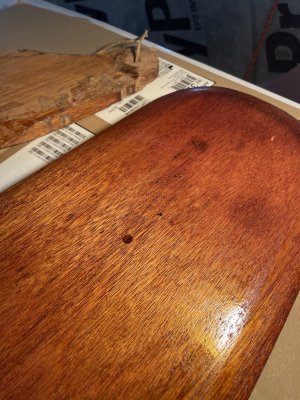
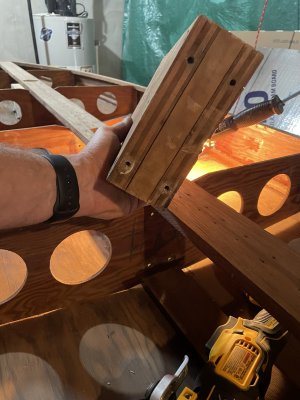
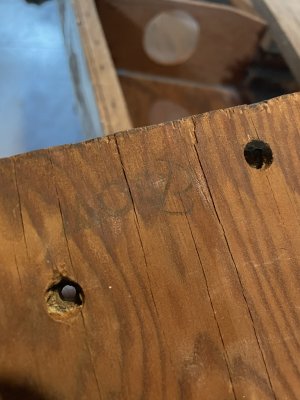
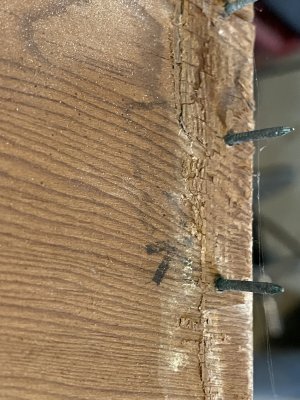
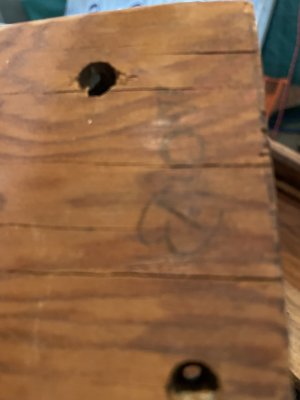
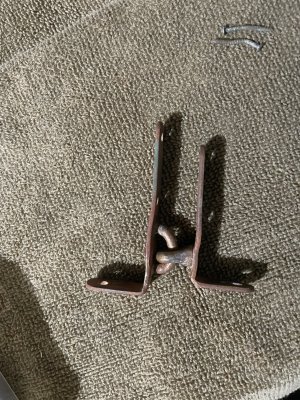
Hello all. Long term stalker, first time posting. I’ve had the privilege of restoring an exceptional example of a very early Super Sailfish. I’ve gotten to know her well, and feel like I’ve also learned much about her sole owner, and even her builders through the process. I’m only midway through the process, but felt this was a good time to reach out for more information from the collective knowledge base. Many thanks to the folks who have shared their wealth of expertise. I hope this particular boat helps to add to the preservation of these boats history.
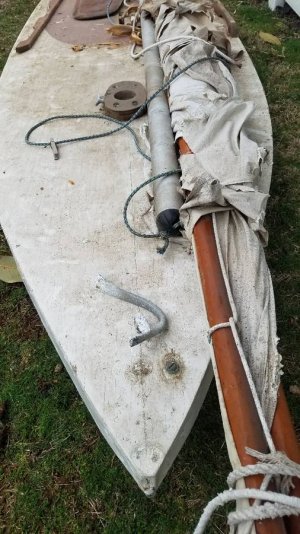
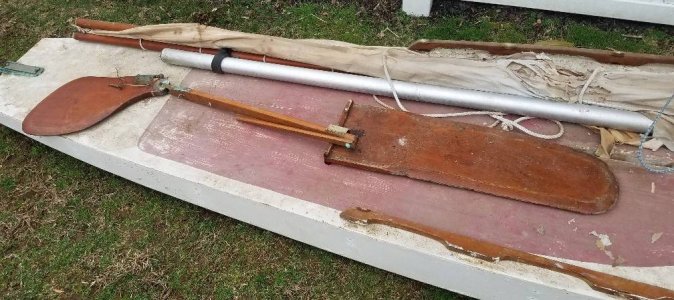
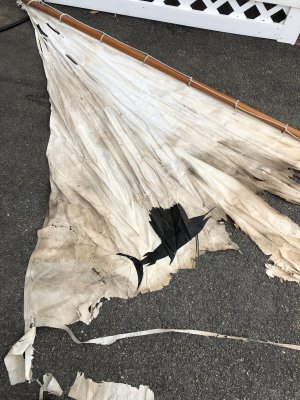
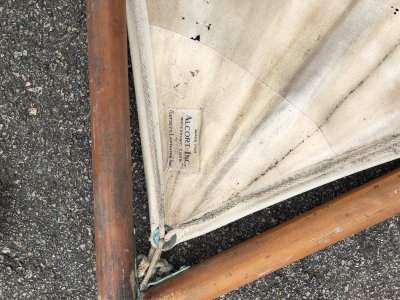
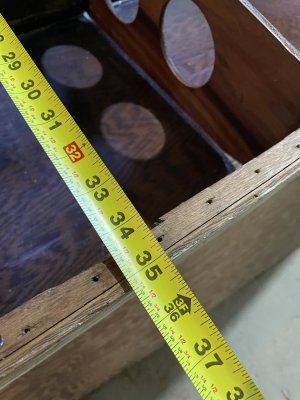
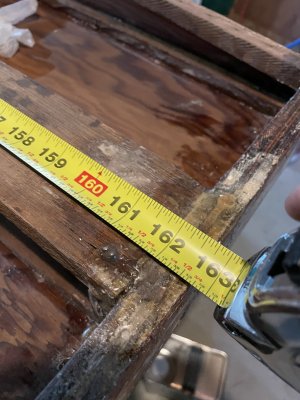
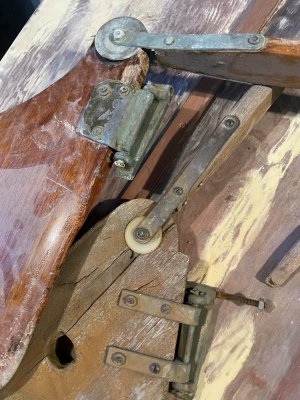
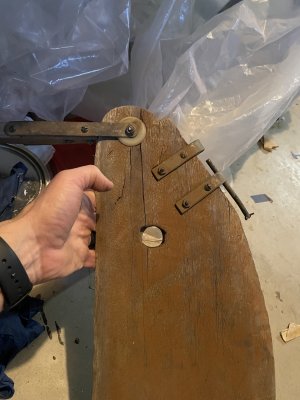
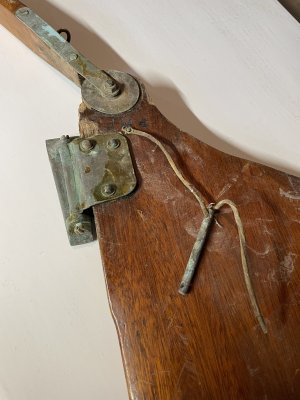
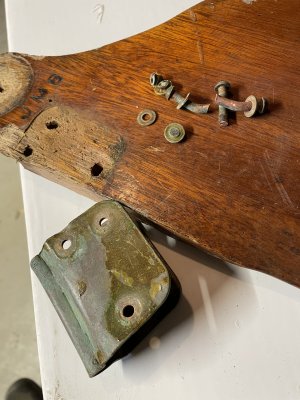
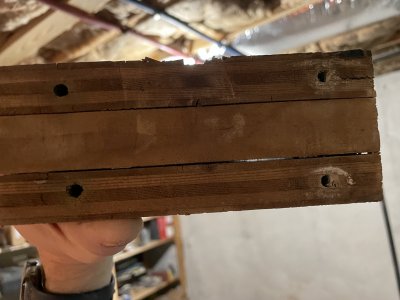
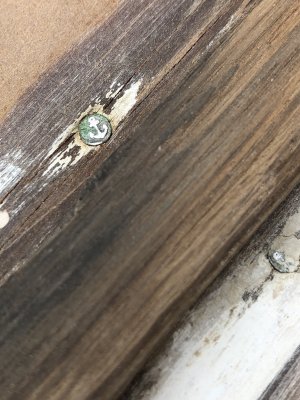
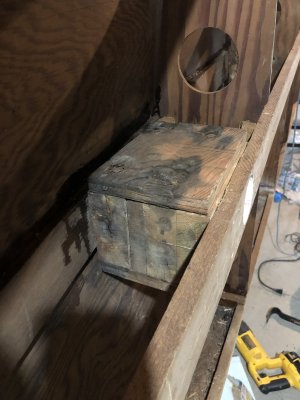
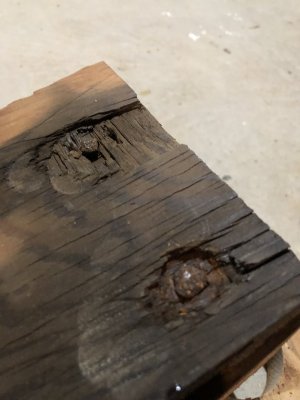
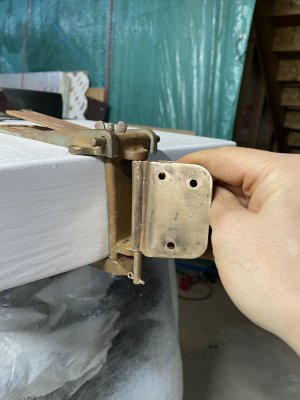
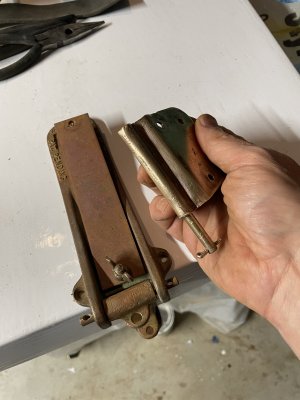
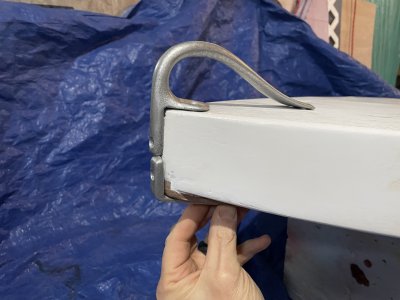
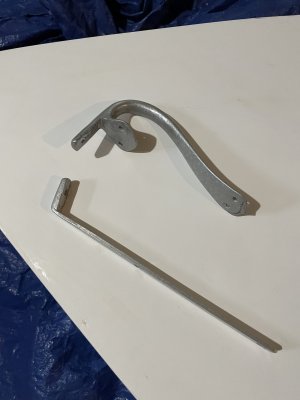
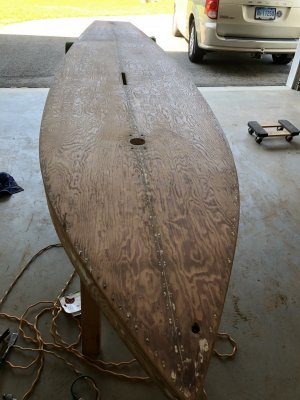
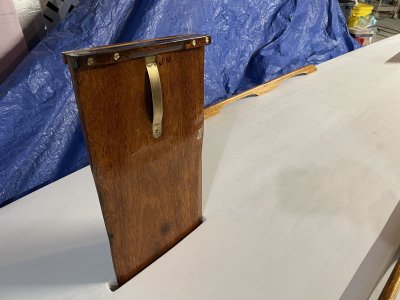
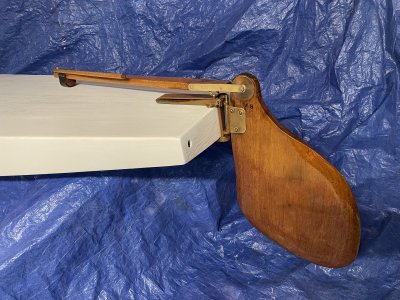
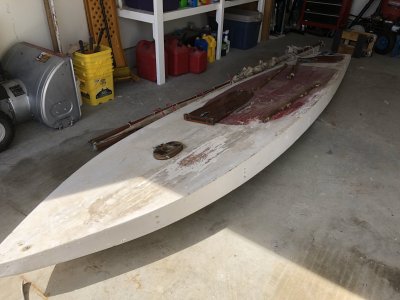
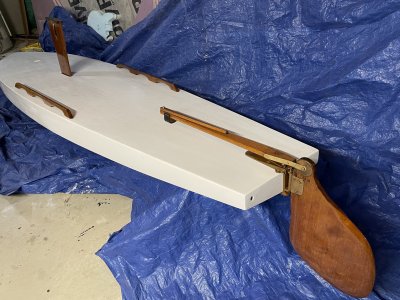
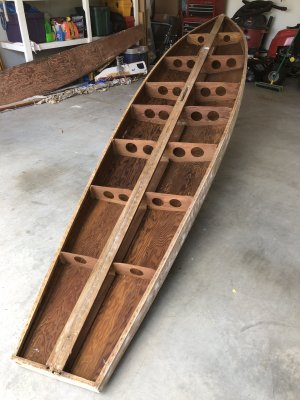
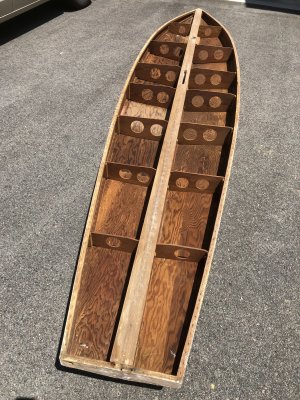
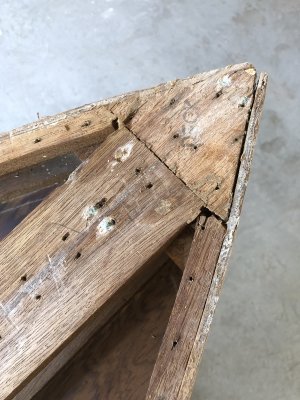
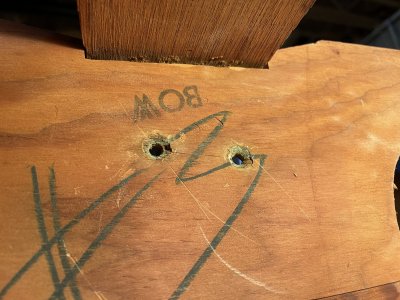
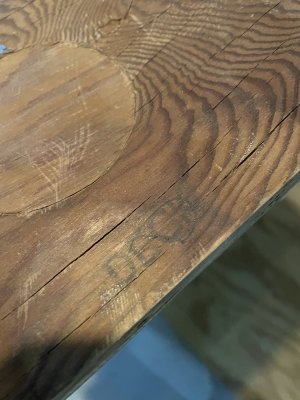
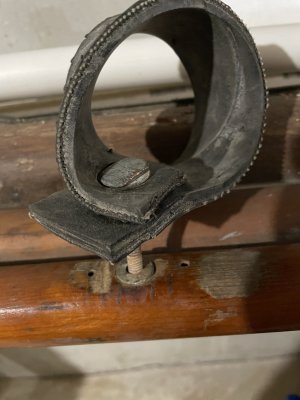
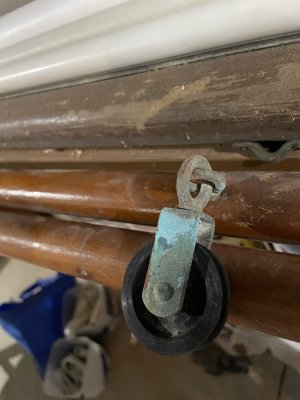
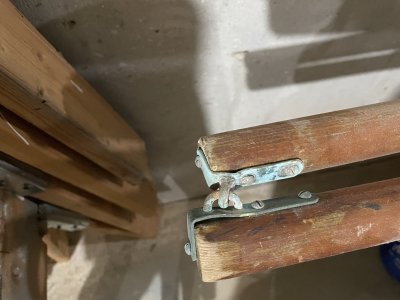
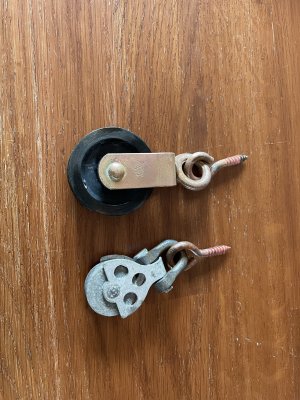
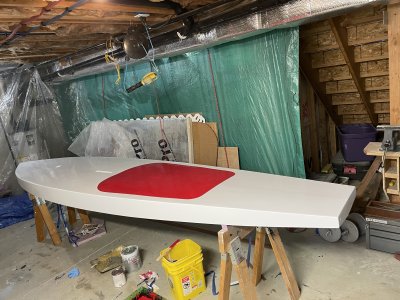
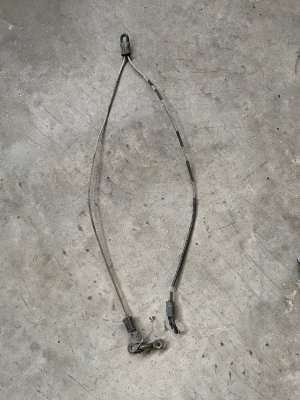
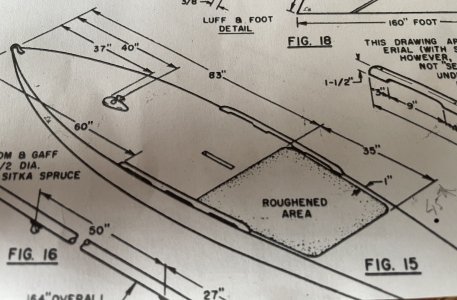
Attached are a couple of pictures of how she came to me.
IMG_0091.jpeg
 

Attachments

  • IMG_0093.jpeg
    IMG_0093.jpeg
    105.2 KB · Views: 134
  • IMG_0092.jpeg
    IMG_0092.jpeg
    113.1 KB · Views: 97
The original, and only owner (other than myself) is a story in his own right. JMS was a collector of some oddities, and had some interesting notabilities in his life. He was not only the first individual to pass through the Connecticut highway toll system at its inception, but made sure to be the last person through at its close. He was a childhood friend of Alex Bryan and Cortland Heyniger, and a noted local waterman having rescued a downed airman in Long Island Sound.
The Sailfish was always a fixture at his home on the Sound, and his nephew whom was tasked with re-homing her after JMS’s passing fondly recalled playing about on her through his childhood.
 

Attachments

  • IMG_2452.jpeg
    IMG_2452.jpeg
    88.3 KB · Views: 85
I just wanted to go sailing.
I had arrived in Connecticut, and simply wanted to play in the wind. You couldn’t get more simple that ‘the fish’, and I set to Craigslist with low expectations, and an even smaller budget. I had done respectable sailboat restorations in the past, but this mission would be different. I wanted cheap and dirty, the most expeditious way to get on the water. I had priced out the materials for a tarp sail, and had a stockpile of flex seal and duct tape ready to go. Finding that even Sunfish were overpriced on Craig’s, I thought to search Sailfish, for a cheaper and more disposable ride. And there she was, listed for a while with no takers.
I can’t help but think that she was destined to be mine, but not as I had originally expected. It was immediately apparent that this boat was more significant and deserved better than my initial plan. She was near complete and original. JMS was not a tinkerer, and did not possess the compulsion to change, modify, or even fix this boat. What she came with, was what she still had. This was now an opportunity to preserve what I see as an important boat. This was the model T of boats; an access to sailing formerly reserved for a more elite class.
To further increase her importance, was the family lore, so casually shared. They always knew of this boat as prototype Super Sailfish. She was gifted to JMS directly from the factory by his childhood friends Alex and Cortland.
Yep, she deserved better that a duct tape salvage job.
 
That will be a fun project. The early Supers were called the Sailfish 14, the big sister to the Sailfish 12. In a short period of time they were called the Standard Sailfish and the Super Sailfish. There was also a Deluxe model. When the fiberglass boat came along it was named the Super Sailfish MKII.

We have a Sailfish 12 and Sailfish 14 Deluxe, and will be happy to watch your restoration and chime in if needed.
IMG_5285.jpeg


IMG_1770.jpeg
 
Glad to meet you Signal Charlie. Looking forward to learning more from you.
Dimensions are 35” wide, just about 163” long.
 

Attachments

  • IMG_2445.jpeg
    IMG_2445.jpeg
    880 KB · Views: 73
  • IMG_2444.jpeg
    IMG_2444.jpeg
    924 KB · Views: 83
A couple indicators of her age would be the ‘patent pending’ rudder piece, but most interesting is the rudder bracket. Rather than the two straps of metal, this one has a single flat piece of contoured metal. No other holes to indicate any kind of alteration from original. From what I learned about the original owner, he would not have been one to improvise an alternate bracket, and it was always understood to have come “direct from the factory”. I’ve seen your excellent educational video, and wondered if you’ve ever seen something like this. (Shown with some later rudder pieces of a fiberglass wreck, as I’m sure you inherently know.)
 

Attachments

  • IMG_3670.jpeg
    IMG_3670.jpeg
    1.2 MB · Views: 82
  • IMG_3845.png
    IMG_3845.png
    6.8 MB · Views: 81
  • IMG_3744.jpeg
    IMG_3744.jpeg
    705.2 KB · Views: 78
I was also wondering if anyone had any input on what the older (standard) Sailfish 12 rudders and rudder hardware looked like. Did they differ from the next generation Sailfish 14?
Next, I’ll need to figure out more about the mast. While everything on this boat seems as original as possible, I have suspicions about the mast that she came to me with. It’s a single aluminum piece, and looks more like what I suspect is off a newer generation boat, and has a plastic top cap.
Does anyone know what the oldest iteration of Sailfish 14 mast would have looked like. I have seen the DIY plans, and figure on making a wood/aluminum mast, but is this what she would have originally had?
Thanks!
 
And another question…
Holes.
On my rudder and centerboard, there were little holes, centerline, no more than a quarter of an inch, and had been well filled and finished over. Similarity, the surplus (60’s?) Super Sailfish rudder and centerboard that I have, have larger holes seemingly intentionally through the pieces.
Any idea why? I suspect that this was something that was done during the manufacturing process to maybe hold the raw wood in a jig, maybe? Curious if this is seen in similar boats of similar generations. Any guess is as good as mine.
 

Attachments

  • IMG_3885.jpeg
    IMG_3885.jpeg
    1.2 MB · Views: 64
  • IMG_3884.jpeg
    IMG_3884.jpeg
    1.4 MB · Views: 65
  • IMG_3883.jpeg
    IMG_3883.jpeg
    885 KB · Views: 73
  • IMG_3882.jpeg
    IMG_3882.jpeg
    1.1 MB · Views: 68
And another question…
Holes.
On my rudder and centerboard, there were little holes, centerline, no more than a quarter of an inch, and had been well filled and finished over. Similarity, the surplus (60’s?) Super Sailfish rudder and centerboard that I have, have larger holes seemingly intentionally through the pieces.
Any idea why? I suspect that this was something that was done during the manufacturing process to maybe hold the raw wood in a jig, maybe? Curious if this is seen in similar boats of similar generations. Any guess is as good as mine.
That is just weird!
 
Among the Sunfish I've acquired, two daggerboards with ⅜" holes drilled centerline about 4 inches apart--came with two boats.

Before using bungee cord to hold the daggerboard in place, I used the bitter end of the mainsheet to hold the board up. But a wooden peg would've worked.
 
Amazing how much overthinking can go into the simplest plans. I was outright torn as to whether or not I should cut off the rivets to refinish the rudder. These had remained intact for some 70 years, and here I was just hacking them off. Well, just like the decision to open the boat up, it was worth it to do the repair proper. These rivets were mangled over time, and it will be nice to have the rudder all tight and right when the finishing is done.
 

Attachments

  • IMG_3876.jpeg
    IMG_3876.jpeg
    1,022.7 KB · Views: 63
  • IMG_3879.jpeg
    IMG_3879.jpeg
    1.1 MB · Views: 76
I have become quite fascinated with the boats fasteners. Almost all of the little anchor imprinted nails had survived and were functioning well. Almost all of the screws had corroded away, and all of the glue was now nonexistent. It proved the right call to have opened her up to allow for regluing the joints and replacing the now vaporized screws. Light would poor through the centerboard box joints, and surely water would too. The mast base block was now a loose stack of blocks. I feel privileged to have been able to see the parts reduced back to parts, and to have been able to put them back together as they should be.
 

Attachments

  • IMG_2067.jpeg
    IMG_2067.jpeg
    1.2 MB · Views: 65
  • IMG_2069.jpeg
    IMG_2069.jpeg
    790.1 KB · Views: 72
  • IMG_2454.jpeg
    IMG_2454.jpeg
    855.3 KB · Views: 71
  • IMG_0335.jpeg
    IMG_0335.jpeg
    838.6 KB · Views: 68
  • IMG_0341.jpeg
    IMG_0341.jpeg
    675.7 KB · Views: 71
  • IMG_0339.jpeg
    IMG_0339.jpeg
    757.3 KB · Views: 74
I have become quite fascinated with the boats fasteners. Almost all of the little anchor imprinted nails had survived and were functioning well. Almost all of the screws had corroded away, and all of the glue was now nonexistent. It proved the right call to have opened her up to allow for regluing the joints and replacing the now vaporized screws. Light would poor through the centerboard box joints, and surely water would too. The mast base block was now a loose stack of blocks. I feel privileged to have been able to see the parts reduced back to parts, and to have been able to put them back together as they should be.
Oops. ‘Pour’. Not ‘poor’
 
And now a question of material importance.
I don’t like using the wrong terms, but I’m not sure of the metals that the rudder components are made of. Would anyone have a good sense of what are the metals of the pictured rudder release brackets, and the hinge piece that attaches to the rudder. Thanks!
 

Attachments

  • IMG_3897.jpeg
    IMG_3897.jpeg
    841.5 KB · Views: 67
  • IMG_3900.jpeg
    IMG_3900.jpeg
    779.2 KB · Views: 71
And now a question of material importance.
I don’t like using the wrong terms, but I’m not sure of the metals that the rudder components are made of. Would anyone have a good sense of what are the metals of the pictured rudder release brackets, and the hinge piece that attaches to the rudder. Thanks!
The picture on my smartphone is too small to be sure, but I think all the parts are bronze. The pin could be chrome-plated brass, as it appears brighter than the duller bronze parts.
 
The picture on my smartphone is too small to be sure, but I think all the parts are bronze. The pin could be chrome-plated brass, as it appears brighter than the duller
The picture on my smartphone is too small to be sure, but I think all the parts are bronze. The pin could be chrome-plated brass, as it appears brighter than the duller bronze parts.
Thanks for the input. I’ve been misusing ‘brass’ as a catch-all for any coppery shiny metals. All the metal bits are getting a good polishing, and I need to determine a good protective coating to put on. Possibly just a rust oleum clear spray coat.
 
From the brass end, moving forward…
With the rudder hardware polished and coated, and the varnish on the elephant ear drying, it gave me a chance to address the hardware at the bow. I needed to re-fabricate the lower rub strip, using a simple piece of aluminum stock, similar to the original part that was beyond repair. The bow handle is cast aluminum and appears to be hand crafted with tooling marks visible on the underside. A little paint tied them together. It’s of almost the exact look of the Wilcox and Chittenden brass bow handle in the attached ad, but without the detailed ridge at the center, and without the ubiquitous ‘WC’ found on so much Sailfish and Sunfish hardware. No other holes appear on the deck, showing that this was the only handle that this bow has seen. Considering the families understanding that this boat was a prototype, I wonder if that was more a description of the fittings, than the boat specifically. The hull itself has all the hallmarks of a production ready, assembly line product, but the rudder hinge and bow handle have the feel of a work in progress. It did come complete from the factory, by the families report. My wild speculation is that this was where Alcort was sorting out what worked, and what didn’t. Some parts made it to the next level, like the handle, which would be mass produced in brass, but not the hinge, which could be done better. The original owner, from the stories I was told, would have been a perfect test subject to put a new boat through its paces. I’m wondering if this boat was as much a test bed, as it was a prototype. Just a thought….
I feel like I‘be gotten to know the designers, builders, and owner of this boat in the process. It’s quite a privilege.
 

Attachments

  • IMG_3937.jpeg
    IMG_3937.jpeg
    1.3 MB · Views: 50
  • IMG_3941.jpeg
    IMG_3941.jpeg
    34.3 KB · Views: 55
  • IMG_3934.jpeg
    IMG_3934.jpeg
    710.1 KB · Views: 53
Oops. Crittenden. Not Chittenden.
Today's replacement bow handles are made of ["Zamak"] zinc. In a couple of my saltwater Sunfish, the zinc behaved like the zinc anodes that are designed to disappear! So many have been cast, the WC trademark may be hard to see.

It's possible that some "Clonefish" may have bow handles made of chrome-plated brass. My Porpoise II bow handle had the patina hallmarks of brass under worn chrome, and was bolted to the deck!
 
Fun project, thanks for bringing us along for the journey.
The weight of the part would be another clue for investigating if the part is aluminum vs zamac vs a copper-based alloy like brass or bronze.
Figuring out the part's weight and then its volume of displaced water would lead to a density calculation that could be compared to other metals.
The old catalog page is a great find.
 
Excellent lessons in metallurgy, thanks! Definitely aluminum. I’ve been trying to preserve and reuse any and every original part that I can, even down to the nails. I’ve been grumbling to myself for having to replace the lower bow rub strip. It was in bad condition, but really it was that I can’t find it. I’m sure that now that I have made a replacement, the original will turn up somewhere.
 
Even though I’m waiting for warmer weather to give a finish coat of paint, I couldn’t resist seeing what the freshly dressed rudder assembly will look like in place.
The paint that she came to me with was, at most, a touch up coat. She’s always been a basic white, with the classic red sit-spot,and I’ve opted to stick with the original livery. After being fully stripped, though, I did consider keeping that wonderful wood patterning exposed. She’ll be clean and simple, like the day she came out of the factory, but always a thought of the beauty beneath.
 

Attachments

  • IMG_0174.jpeg
    IMG_0174.jpeg
    814.8 KB · Views: 56
  • IMG_3958.jpeg
    IMG_3958.jpeg
    1.5 MB · Views: 50
  • IMG_3952.jpeg
    IMG_3952.jpeg
    2.1 MB · Views: 56
  • 57825777576__B94967D2-B02E-4B6A-9451-B1B7C549618B.jpeg
    57825777576__B94967D2-B02E-4B6A-9451-B1B7C549618B.jpeg
    1.1 MB · Views: 48
  • IMG_3957.jpeg
    IMG_3957.jpeg
    2.1 MB · Views: 60
While I delayed in opening her up to do the interior restoration, I took even longer in sealing her back up.
I delayed popping the hood for fear of doing more damage than what I was fixing, but it was an appreciation of the sheer beauty of the interior that kept me from closing her back up right away. I was able to reuse both halves of the two part deck, and many of the nails. I have so much respect for the craftsman who put this boat together. You could feel the skill and precision in their work. I couldn’t help but imagine things from their perspective some 70 years ago, the last time the inside of this boat saw the light of day.
 

Attachments

  • IMG_0184.jpeg
    IMG_0184.jpeg
    2 MB · Views: 51
  • IMG_0178.jpeg
    IMG_0178.jpeg
    920.8 KB · Views: 48
  • IMG_0185.jpeg
    IMG_0185.jpeg
    2.1 MB · Views: 48
There has been some discussion in the past as to whether factory built boats had markings on their components, and I have a couple of pictures to submit in that regard.
What I do know is that the original owner always asserted that this was a factory built boat, and the family had no reason to doubt that. Our proximity to Waterbury and his connections with the boating community makes it reasonable to believe that he did indeed know Alex and Cortland like the family said he did.
I was told simply that this was “the first Super Sailfish”, and also that this was “the prototype Super Sailfish”.
What I saw inside were multiple parts marked with a stamp indicating orientation to bow or deck. Many had faded and were a bit light , and some would have been hidden between joined parts if I had opened her up differently. Some were apparently so light initially that some letters were penciled in.
This is mere speculation, but I could see the process of mass producing these parts for either kit or factory boat being the same. Cut it, stamp it, put it in the same bin. I could also see the functionality of having these parts labeled, even in a factory setting, as the subtlety of their cut might not be readily apparent to the eye. If a kit builder needed to know the intended orientation of a part, a factory builder could benefit from the reminder as well.
The lateral members not only had the orientation stamping, but hand written numbering indicating their proper place. Regardless of factory or kit, I can see the necessity of these being labeled to make sure that these nearly identical pieces made it to their proper station.
Additionally, there is now a hand written message on the inside, awaiting the next restorer in another 70 years.
 

Attachments

  • IMG_2453.jpeg
    IMG_2453.jpeg
    970.9 KB · Views: 50
  • IMG_2078.jpeg
    IMG_2078.jpeg
    2.1 MB · Views: 53
  • IMG_2071.jpeg
    IMG_2071.jpeg
    937.1 KB · Views: 50
  • IMG_2073.jpeg
    IMG_2073.jpeg
    858 KB · Views: 46
  • IMG_2439.jpeg
    IMG_2439.jpeg
    923.6 KB · Views: 44
  • IMG_2074.jpeg
    IMG_2074.jpeg
    689.1 KB · Views: 50
Even though I’m waiting for warmer weather to give a finish coat of paint, I couldn’t resist seeing what the freshly dressed rudder assembly will look like in place.
The paint that she came to me with was, at most, a touch up coat. She’s always been a basic white, with the classic red sit-spot,and I’ve opted to stick with the original livery. After being fully stripped, though, I did consider keeping that wonderful wood patterning exposed. She’ll be clean and simple, like the day she came out of the factory, but always a thought of the beauty beneath.
Love that rudder! :)
 
A break in the weather has allowed for putting on a top coat of paint, hopefully good enough to be the finish coat.
Now onto the spars, and the mast. Much of the spar hardware is original, in whole, or in part. One of the pulleys survives, but I haven’t been able to find a suitable replacement. Not sure if I’ll keep the one original on, for sake of authenticity, or trade them both out for symmetry. Not sure what I’ll resolve to do for the definitely non original gooseneck. Judging by the drill holes, it appears that she would have originally had a style of screwed on gooseneck, like this picture from another posters project. Great appreciation and thanks to everyone for putting their information out there to help the next restorationists. This is part of the reason why I felt it was important to post my project online, and to make my example of a boat available to add to the knowledge base.
I am amused by the jury rigged gooseneck that she had. Yes, that is a strip of tire rubber, and I do think that we are looking at a toilet flange bolt. As much as I want to bring her back to as original as possible, I feel like I want to somehow celebrate the commode hardware that was saving the day.
 

Attachments

  • IMG_3967.jpeg
    IMG_3967.jpeg
    1.5 MB · Views: 51
  • IMG_3924.jpeg
    IMG_3924.jpeg
    803 KB · Views: 47
  • IMG_3923.jpeg
    IMG_3923.jpeg
    826.8 KB · Views: 50
  • IMG_3920.jpeg
    IMG_3920.jpeg
    1.4 MB · Views: 43
  • IMG_3921.jpeg
    IMG_3921.jpeg
    1.5 MB · Views: 45
  • IMG_3943.jpeg
    IMG_3943.jpeg
    256.2 KB · Views: 47
  • IMG_3929.jpeg
    IMG_3929.jpeg
    1.2 MB · Views: 59
We all can keep a secret, right?
I’ve created a crime against authenticity. In painting the ‘sit-spot’, I accidentally extended it an extra 12 inches back to the stern, making it 47 inches long rather than the scripted 35 from the Alcort home build plans. (Again, thanks to those who made sure these were posted online, SC!)
At least I was able to reuse the 3 loop bridle that came with. That’s $30 saved right there. Might not be the best for performance, but authentic…
 

Attachments

  • IMG_3986.jpeg
    IMG_3986.jpeg
    1.9 MB · Views: 43
  • IMG_3987.jpeg
    IMG_3987.jpeg
    1.5 MB · Views: 41
  • IMG_3989.jpeg
    IMG_3989.jpeg
    2.8 MB · Views: 45
We all can keep a secret, right?
I’ve created a crime against authenticity. In painting the ‘sit-spot’, I accidentally extended it an extra 12 inches back to the stern, making it 47 inches long rather than the scripted 35 from the Alcort home build plans. (Again, thanks to those who made sure these were posted online, SC!)
At least I was able to reuse the 3 loop bridle that came with. That’s $30 saved right there. Might not be the best for performance, but authentic…
Oh the humanity!
Next thing you'll know it will have cupholders and USB charging ports
:D
Just kidding, looks great! I would have considered some sculpted EVA foam w/ self-stick adhesive for the sitting area, like the stuff used on SUP's.
 
Oh the humanity!
Next thing you'll know it will have cupholders and USB charging ports
:D
Just kidding, looks great! I would have considered some sculpted EVA foam w/ self-stick adhesive for the sitting area, like the stuff used on SUP's.
I made a cup holder for my ex-racer "test-mule" Sunfish. (The one with "The Ultimate Inspection Port").
;)

It's made from large PVC pipe, and was to be epoxied forward of the cockpit. It was going to be in the way of someone's feet or would involve removing Styrofoam support: so the effort was brought to a stop.

As for the USB charging port, I see a small solar panel in someone's future!

:)
 
Most of the rudder assembly fittings look original except for the part in your hand that screws to the wooden blade. Maybe they oly had a few of the U shaped straps that day? As for the metal, I was told that Alcort ordered bronze parts by the pound from Wilcox Crittenden & Co Inc. But WC also made other metals, brass, galvaniized, chrome plated brass...

Love the Anchor nails!
 

Back
Top